
Organisation settings — profile, academic year, signature and seal
Set your school or business profile in Pathshala — name, address, contact phone, organisation type, academic year, admission numbers, signature, seal and KYC.
Settings at the foot of the menu opens one page of cards for your whole organisation: Organisation, People & roles, Getting paid & KYC, WhatsApp, Notifications, Integrations & developers and Billing. Each card links to the screen that does the job. (A staff login without the settings permission sees its own settings rows in a small Settings fold instead.)
Your organisation's profile, academic year, admission numbering, notifications and security all live on the Organisation details page, which has five tabs. Most changes are for the owner and admin; some, such as the organisation type, are for the owner only.
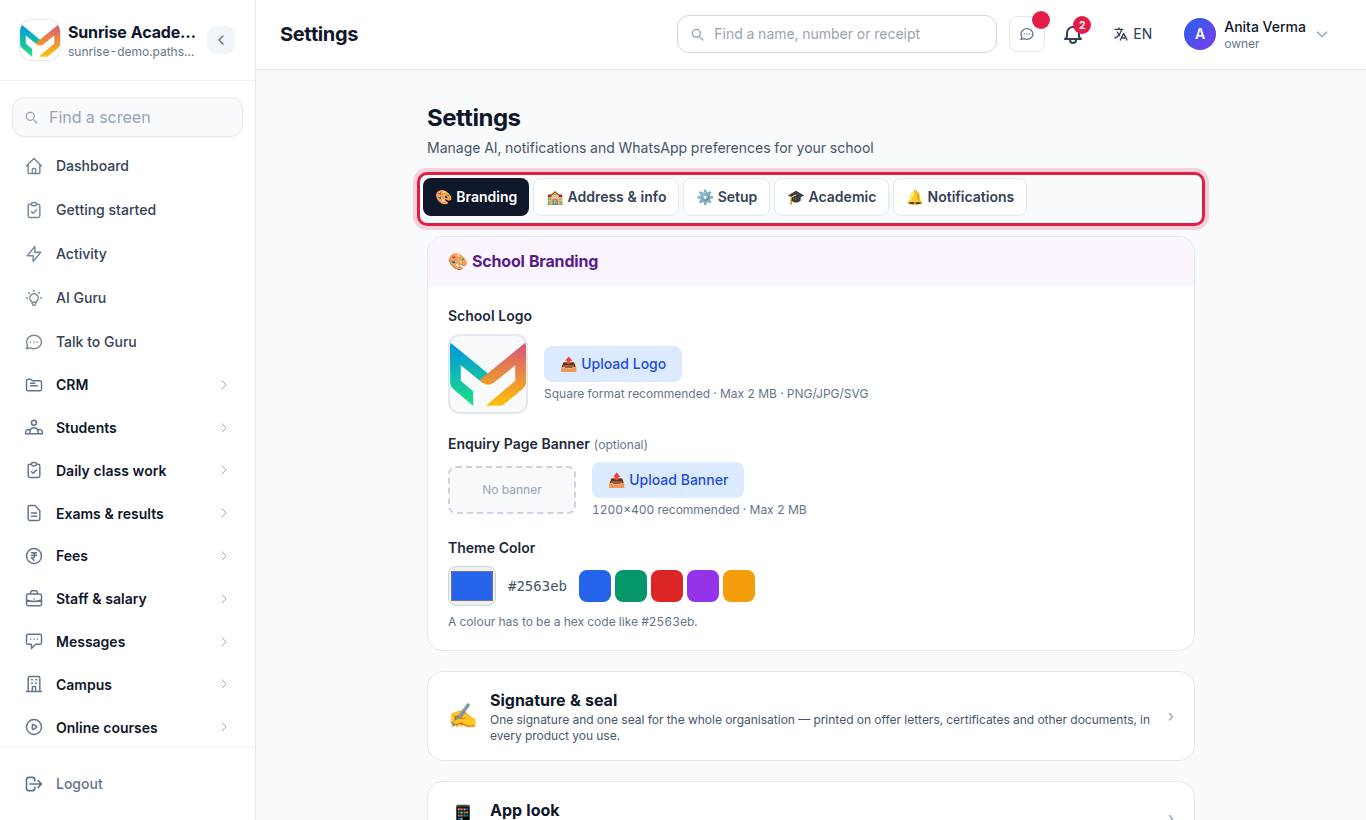
The page has five tabs: 🎨 Branding, 🏫 Address & info, ⚙️ Setup, 🎓 Academic and 🔔 Notifications. The tab you are on is kept in the address (for example /settings#tab=setup), so you can bookmark it.
#How to update your organisation's profile
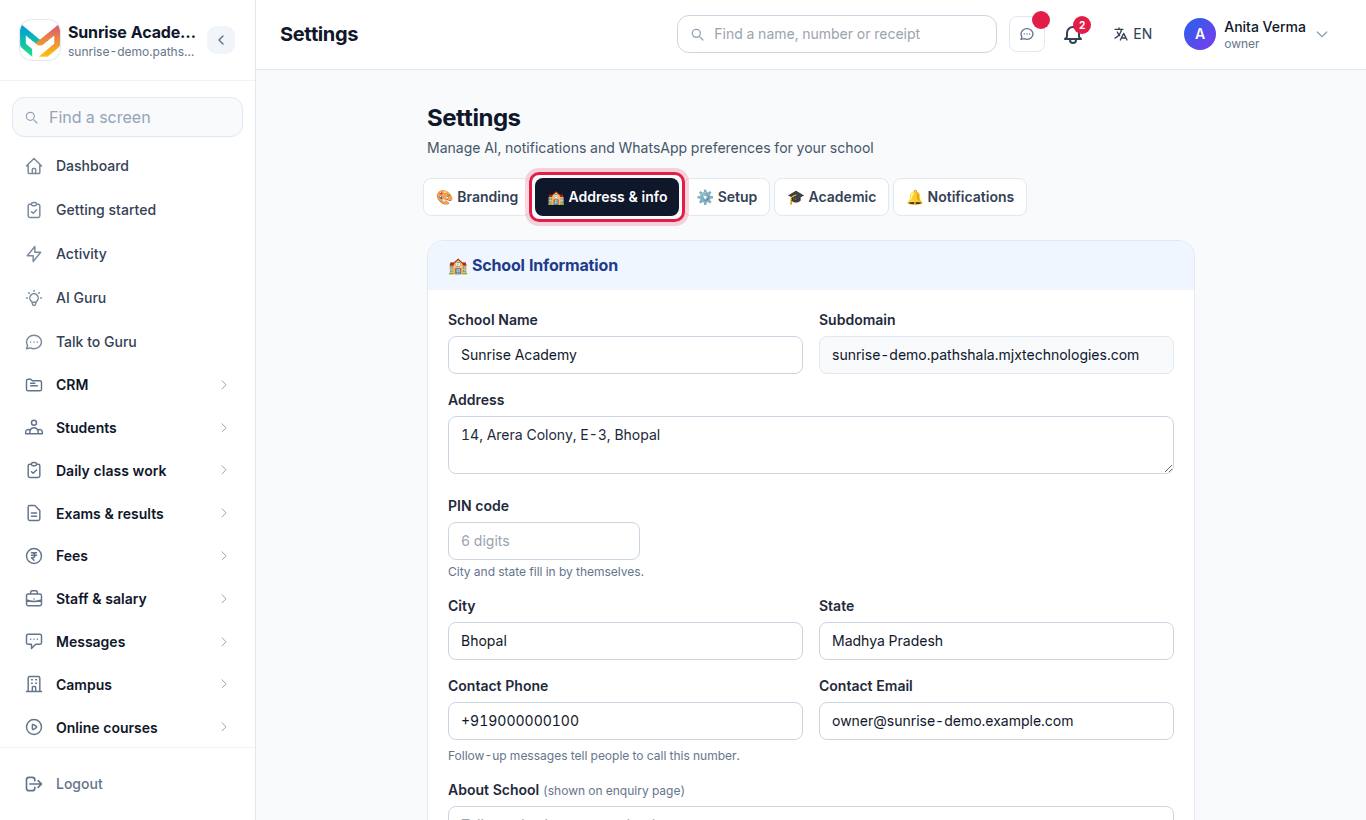
- Under School Information, fill in:
| Field | What to enter |
|---|---|
| School Name | Your organisation's name, as it should print |
| Subdomain | Read-only: your portal address, yourname.pathshala.mjxtechnologies.com |
| Address | Street address |
| PIN code | 6 digits — city and state fill in by themselves |
| City / State | Your state is also used on MJX's GST tax invoices |
| Contact Phone | The number follow-up messages give people to call |
| Contact Email | The public email for your organisation |
| About School | A short introduction shown on your enquiry page |
- Press 💾 Save School Info. You see ✓ Saved!
#How to change your organisation type
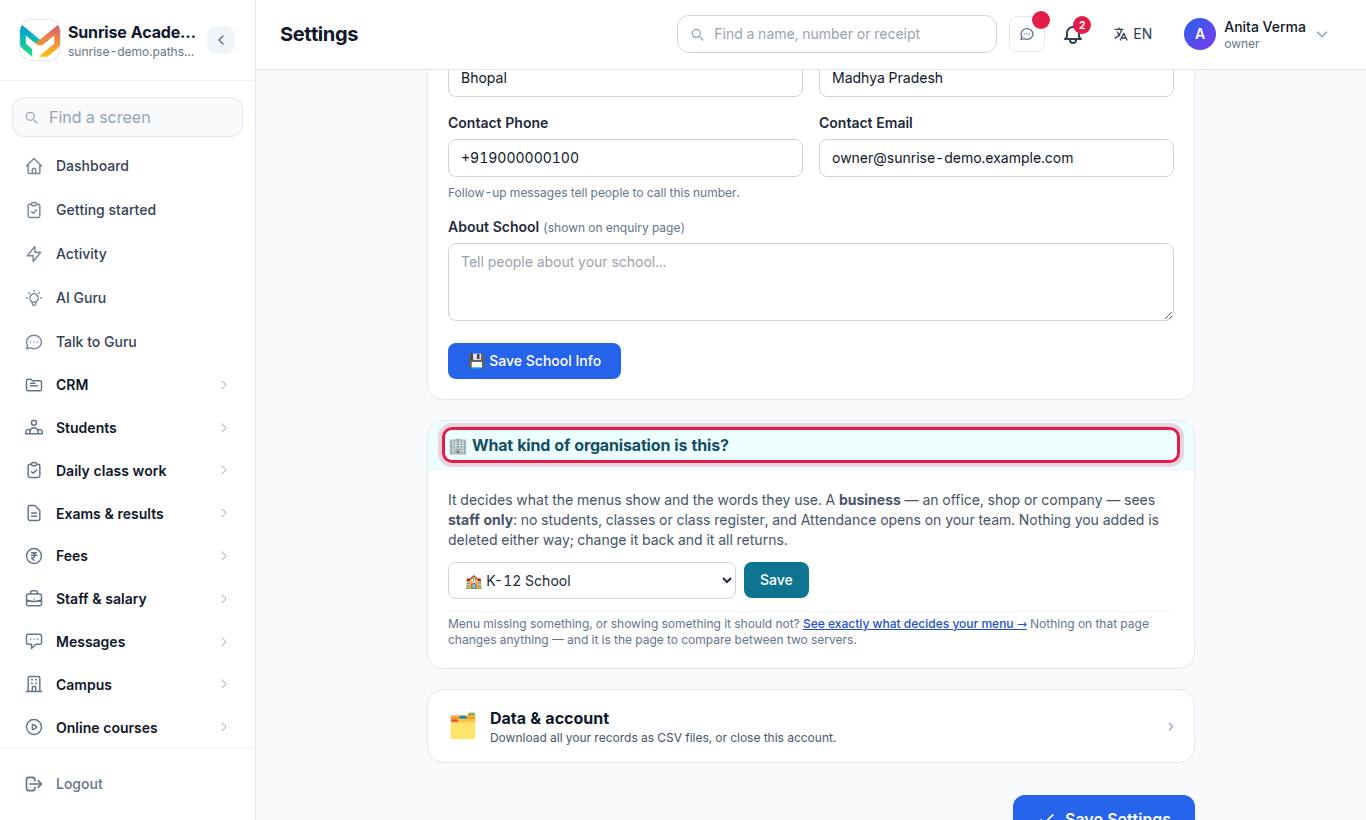
- Choose the type from the list, for example Business — an office, shop or company (staff only).
- Press Save.
Only the owner can change this; others see "Only the owner can change this." The type decides the words on screen and which menus appear — a Business has staff only, with no students. Press See exactly what decides your menu → to see why each menu row is shown or hidden.
#Export your data or close the account
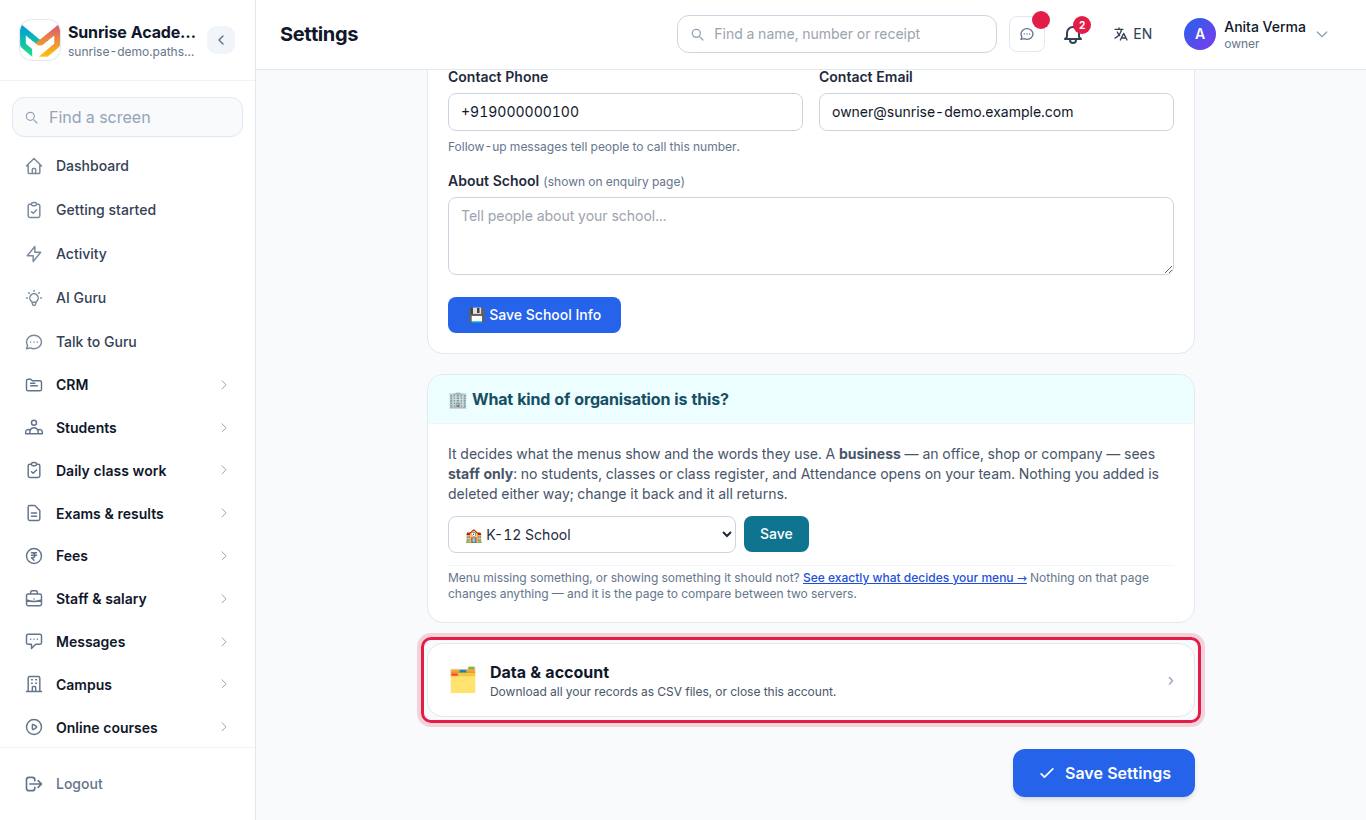
Only the owner sees Data & account. Press Export data for a ZIP of CSV files with all your records, or close the account from the same page. See Data and privacy for what is in the export and what happens when you close.
#How to set the academic year
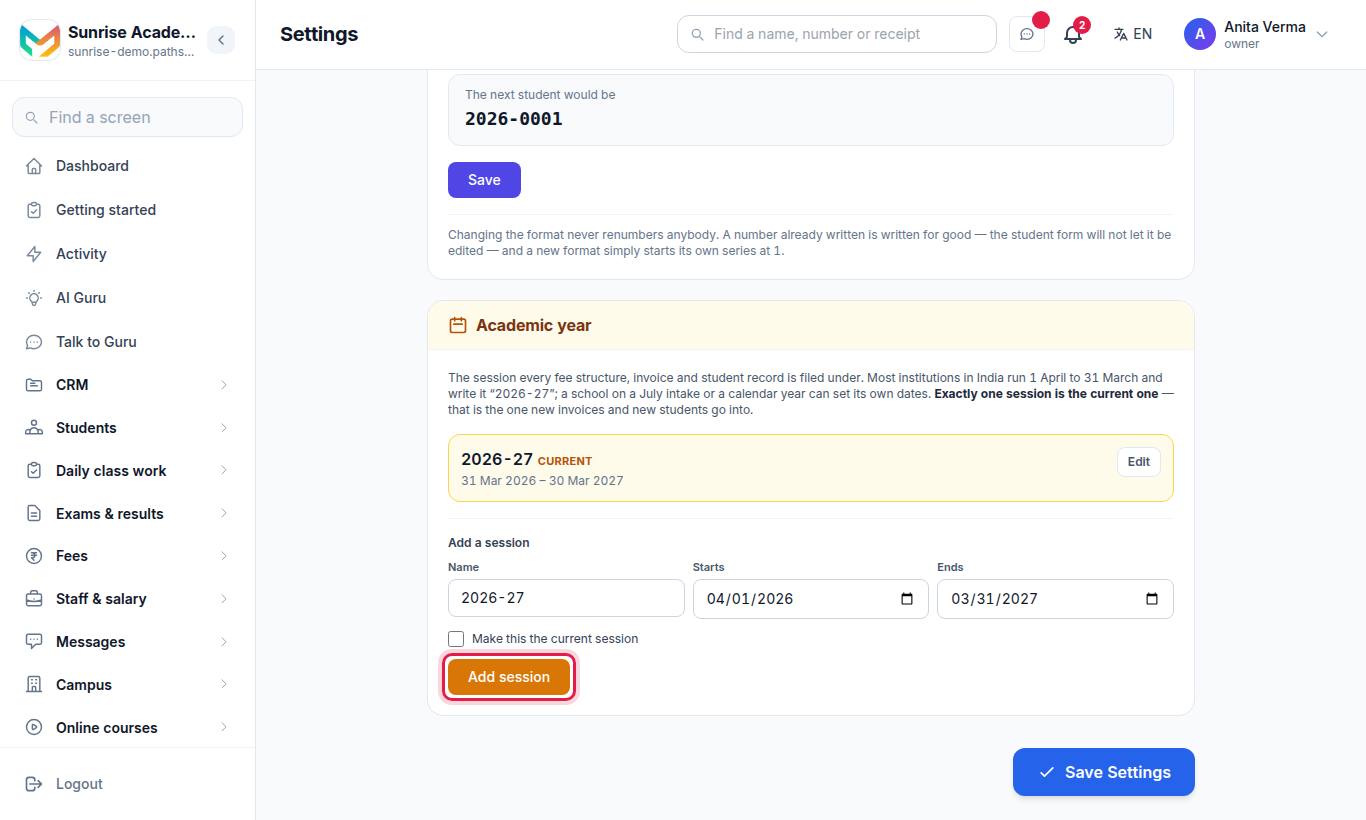
- Under Add a session, enter Name (for example
2027-28), Starts and Ends. - Tick Make this the current session if it is the one you are working in.
- Press Add session.
Each session in the list has Make current and Edit. Only an owner or admin can change the academic year.
#How to number admissions automatically
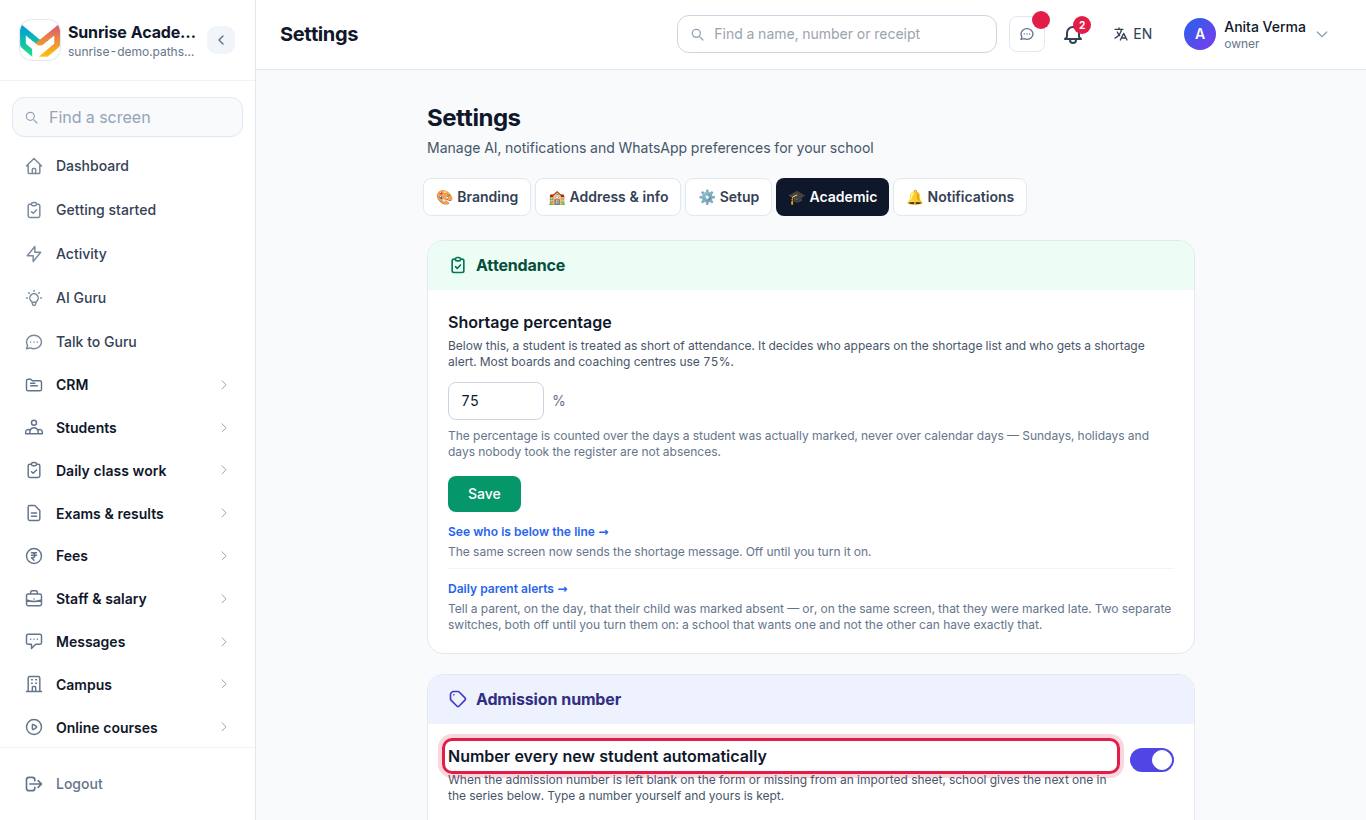
- Turn on Number every new student automatically.
- Set Prefix (optional), Year (Calendar year, Academic year or No year), Digits and Separator (Dash, Slash, Dot, Underscore or None).
- Check the preview — The next student would be … — and press Save.
Changing the format never renumbers anybody. Only the owner can change it.
#Attendance shortage
On the same tab, Attendance › Shortage percentage (75 by default) sets when a student is flagged for low attendance. Press Save. This needs MJX Academic.
#How to add a signature and seal
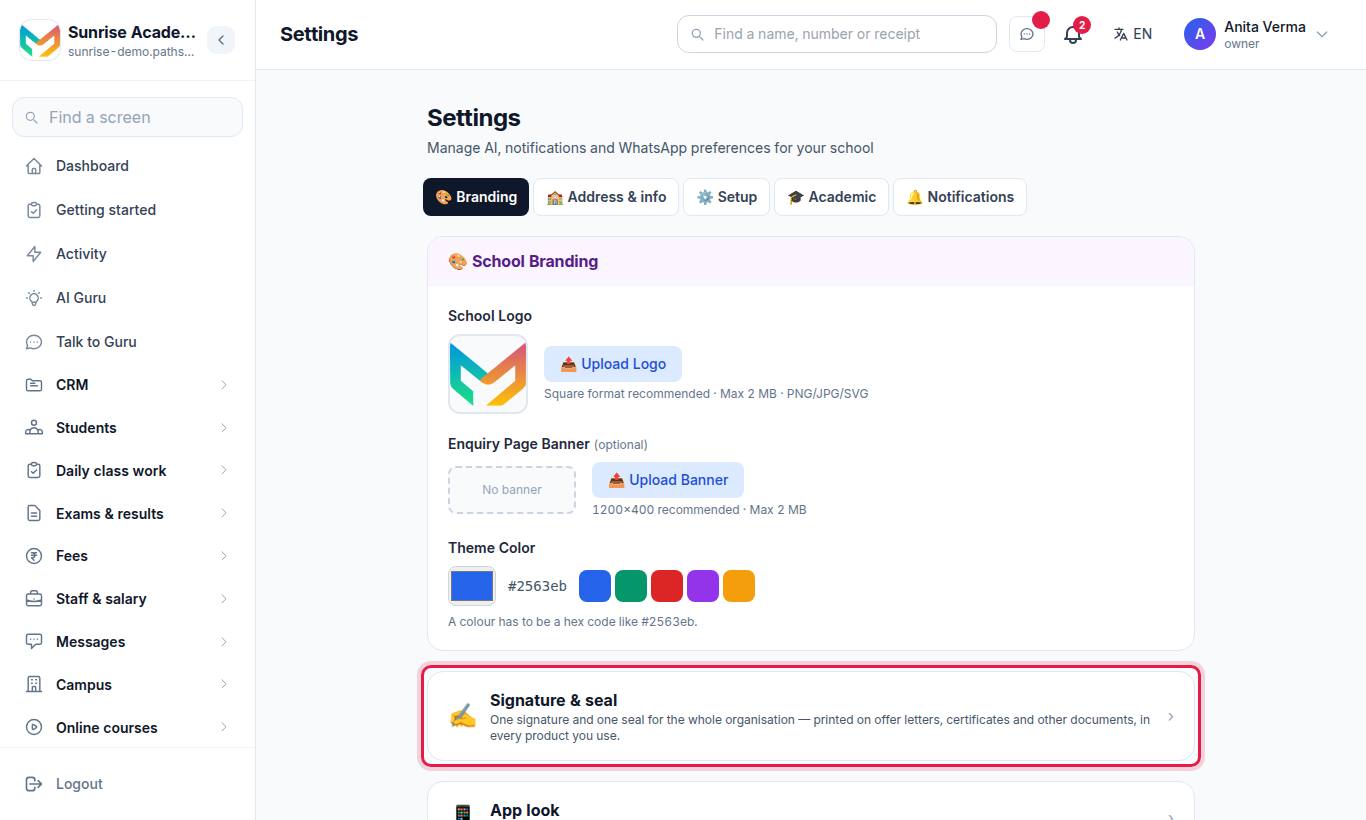
One signature and one seal for the whole organisation, printed on offer letters, certificates and the other documents you issue — in every product you use.
- Under Signature, upload a scan of the signature on white or a transparent background.
- Under Seal or stamp, upload a photo or scan of the round stamp.
| Rule | Detail |
|---|---|
| File types | PNG or JPG only — a PDF or WEBP cannot be printed on a certificate |
| Size | Up to 2 MB each |
| Best result | A PNG with a transparent background |
| Who | Owner and admin |
#What is on the Setup tab?
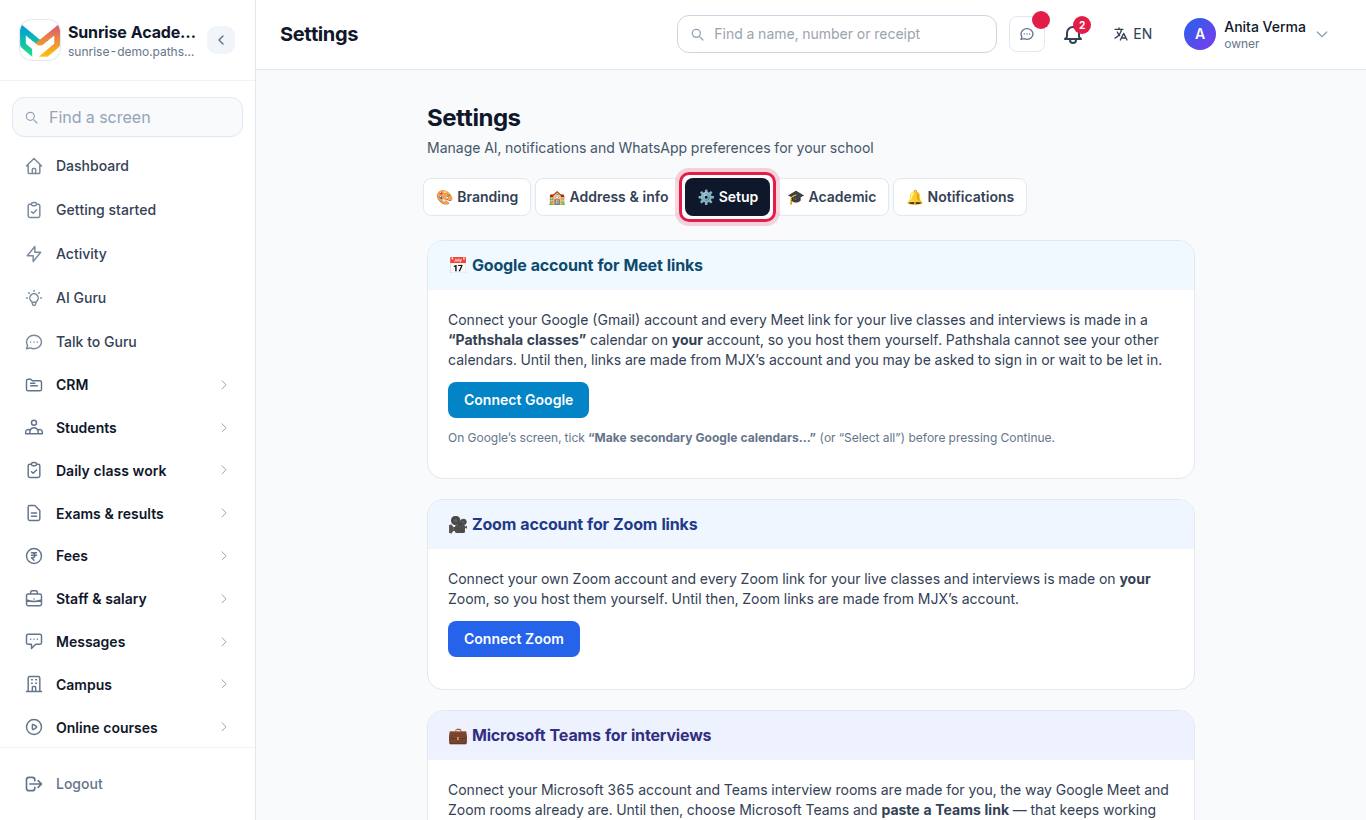
| Card | What it does |
|---|---|
| Google account for Meet links | Connect Google so live classes get Google Meet links. Disconnect removes it. |
| Zoom account for Zoom links | Connect Zoom for Zoom live-class links |
| Microsoft Teams for interviews | Connect Microsoft Teams (with MJX HR) |
| WhatsApp Settings | Link to Your WhatsApp number, templates & broadcasts, and switches for AI Auto-Reply, Owner Manual Reply and AI Reply only in Business Hours (9 AM – 8 PM) |
| Account Security | Two-factor sign-in for your own login — see Sign-in and security |
| AI Behavior | AI usage & monthly limit, Use Knowledge Base, and the AI Fallback Message (up to 500 characters) sent when the AI cannot answer |
Pathshala only asks Google for its own calendar named "Pathshala classes"; it cannot read your other calendars.
#Notifications
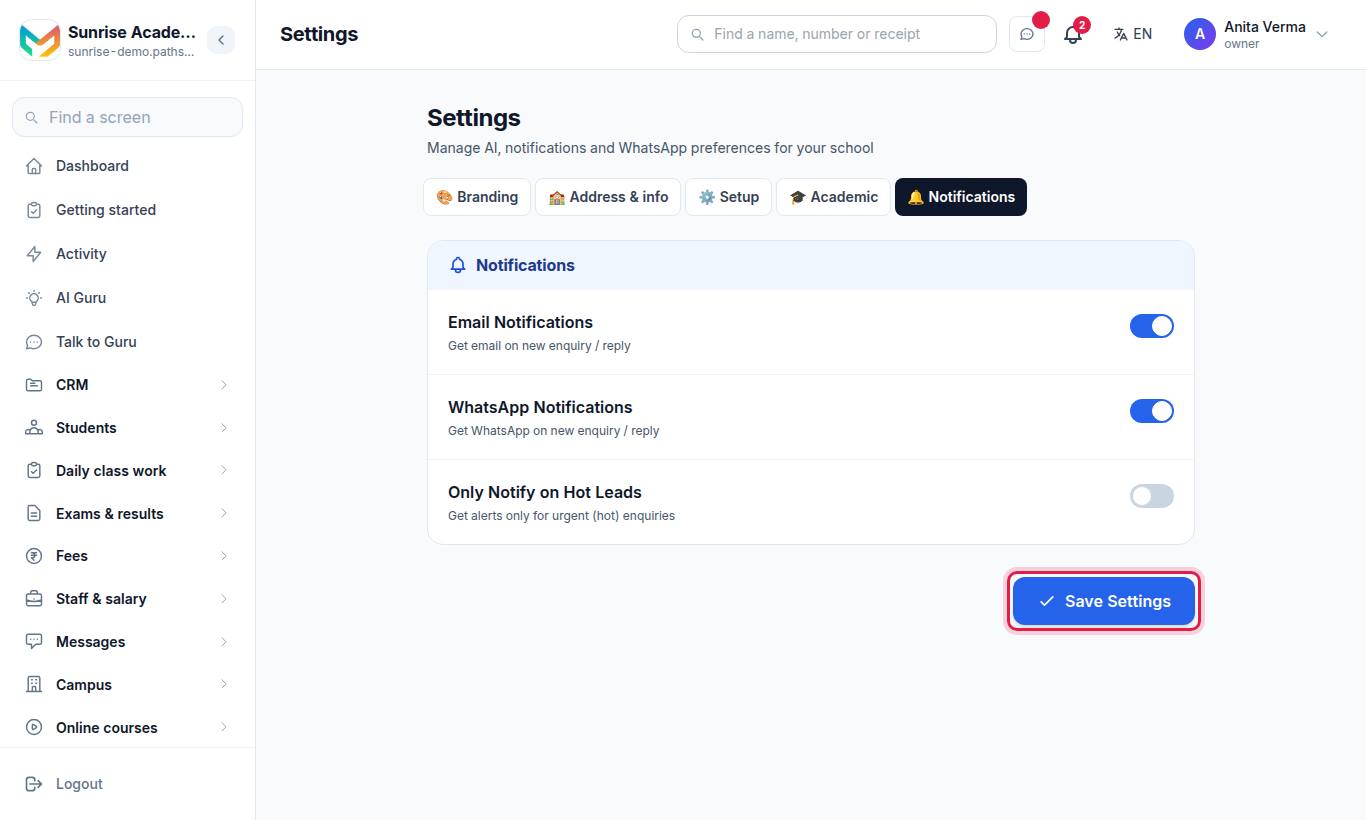
Switch Email Notifications, WhatsApp Notifications and Only Notify on Hot Leads on or off.
#How to complete KYC
MJX needs to know who every institution on the platform is. You do it once, on the one page Getting paid & KYC, and are not asked again unless something changes. Owner and admin only. Your steps at the top shows each step as Done, To do, Being checked or Not needed. Old links to Complete KYC open the same page.
- 1. Verify identity — under Verify your Aadhaar in about a minute, press Verify with DigiLocker and sign in to DigiLocker with Aadhaar and OTP. MJX keeps only your name, date of birth, gender and the last 4 digits of Aadhaar, and you do not need to upload an Aadhaar paper.
- 2. PAN comes with DigiLocker when it is in your DigiLocker. Otherwise press Upload your PAN card (step 4).
- 4. KYC documents — send only what the step lists as Still needed. Under Upload KYC document, choose Which document is this? — PAN card, GST certificate, Aadhaar, Cancelled cheque, Bank statement, Registration / incorporation, Address proof or Something else.
- Pick the file and press Send to MJX.
Each document shows Waiting for MJX, Accepted or Not accepted (with the reason). You can Remove a document until it is accepted.
#Who can change what?
| Setting | Who |
|---|---|
| Profile, branding, signature & seal, academic year, KYC | Owner and admin |
| Organisation type, admission-number format, Save Settings switches | Owner only |
| Two-factor sign-in (your own) | Every user |
#Related
#Questions people ask
Where do I change my school's name and address?
Settings › Address & info. Edit the fields and press "Save … Info".
Why are fee invoices not being raised?
Fees cannot raise an invoice until an academic year (session) exists. Add one in Settings › Academic › Academic year.
Where do I upload the principal's signature and the school seal?
Settings › Branding › Signature & seal. They print on certificates, offer letters and other documents in every product.
Where do I enter my GSTIN?
Your GSTIN for receipts to your own learners is on the Invoices & GST page under Online courses (/fees/courses/gst). It is not on the main Settings page.
Is KYC compulsory?
Yes. MJX needs to know who every institution on the platform is. The owner or admin completes it once at Settings › Getting paid & KYC.