
Set up payroll in Pathshala
Follow the 7-step "Get payroll ready" checklist — address, TAN, pay day, PF/ESI/PT, salaries, bank details and your first pay run.
Setting up MJX Payroll takes seven short steps. In Pathshala the Payroll screen shows a Get payroll ready panel — "Finish these and you can pay everybody in a few taps." — with a progress bar ("3 / 7 done") until every step is complete.
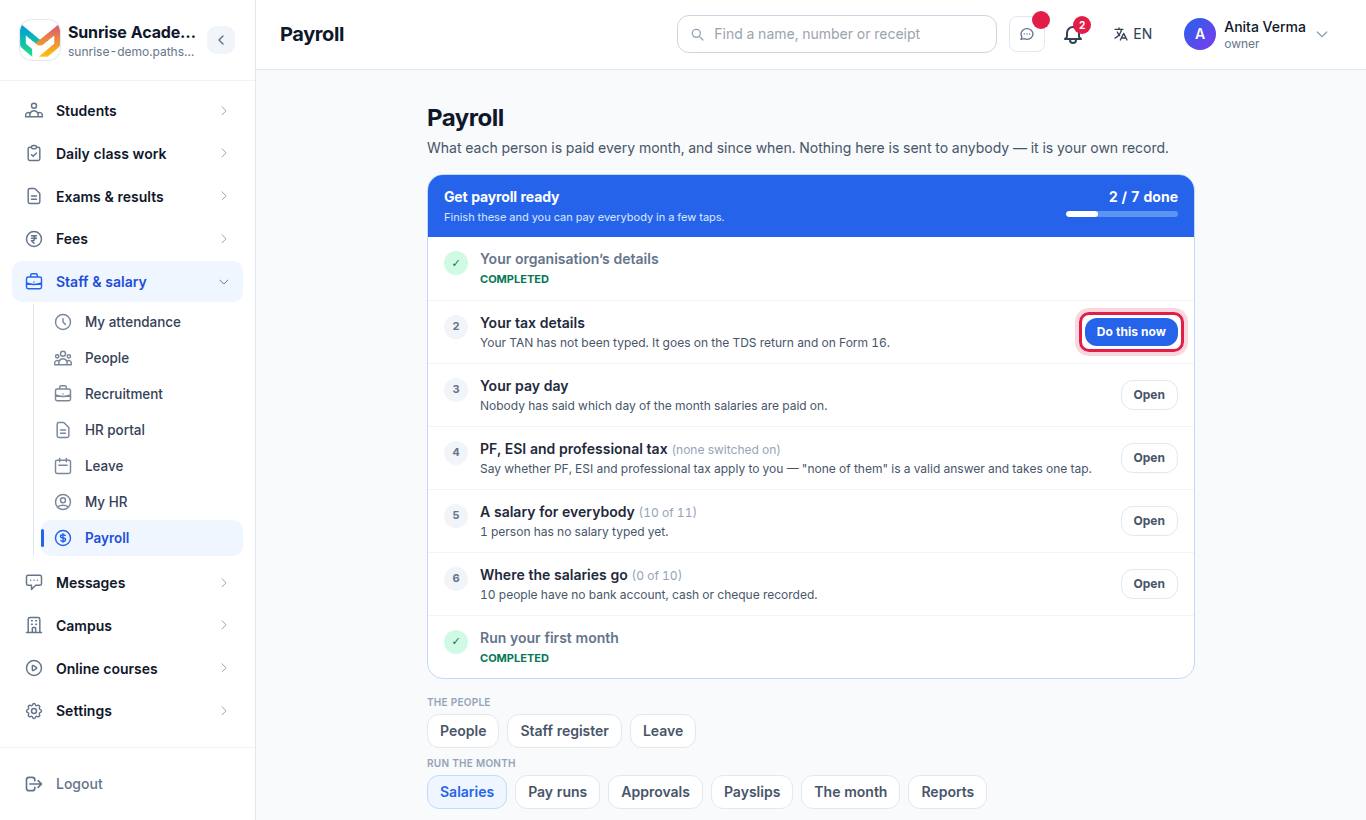
Each step has a button. The next step to do shows Do this now; the others show Open. A finished step says COMPLETED.
#Steps to get payroll ready
- Your organisation's details — the name and address printed on every payslip. Opens Settings. If the address is missing you see "Add your address — it is printed on every payslip."
- Your tax details — the TAN that goes on the TDS return and on Form 16. Opens Filing › Your numbers. Type the TAN and press Save.
- Your pay day — which day of the month salaries are paid on. Opens Pay runs. Fill in "Which day of the month do you pay on?" and press Save.
- PF, ESI and professional tax — whether they apply to you, and at what rates. Opens PF, ESI & PT. Saving with nothing ticked is a valid answer. See PF, ESI and PT.
- A salary for everybody — what each person is paid, and since when. Opens Payroll (Salaries). The step shows how many people have a salary, for example "8 of 10". See salary structures.
- Where the salaries go — a bank account, or cash, or cheque, for each person. Opens Where salaries go.
- Run your first month — draft, approve, record the payment, send the payslips. Opens Pay runs. See run payroll and issue payslips.
#How to add your people first
Payroll pays people who are already on the staff list. Add them on the People screen first — see employees. Each person needs a login if they are to open their own payslip or receive it on WhatsApp and email (it goes to the mobile and email on their login).
#How to set where salaries go
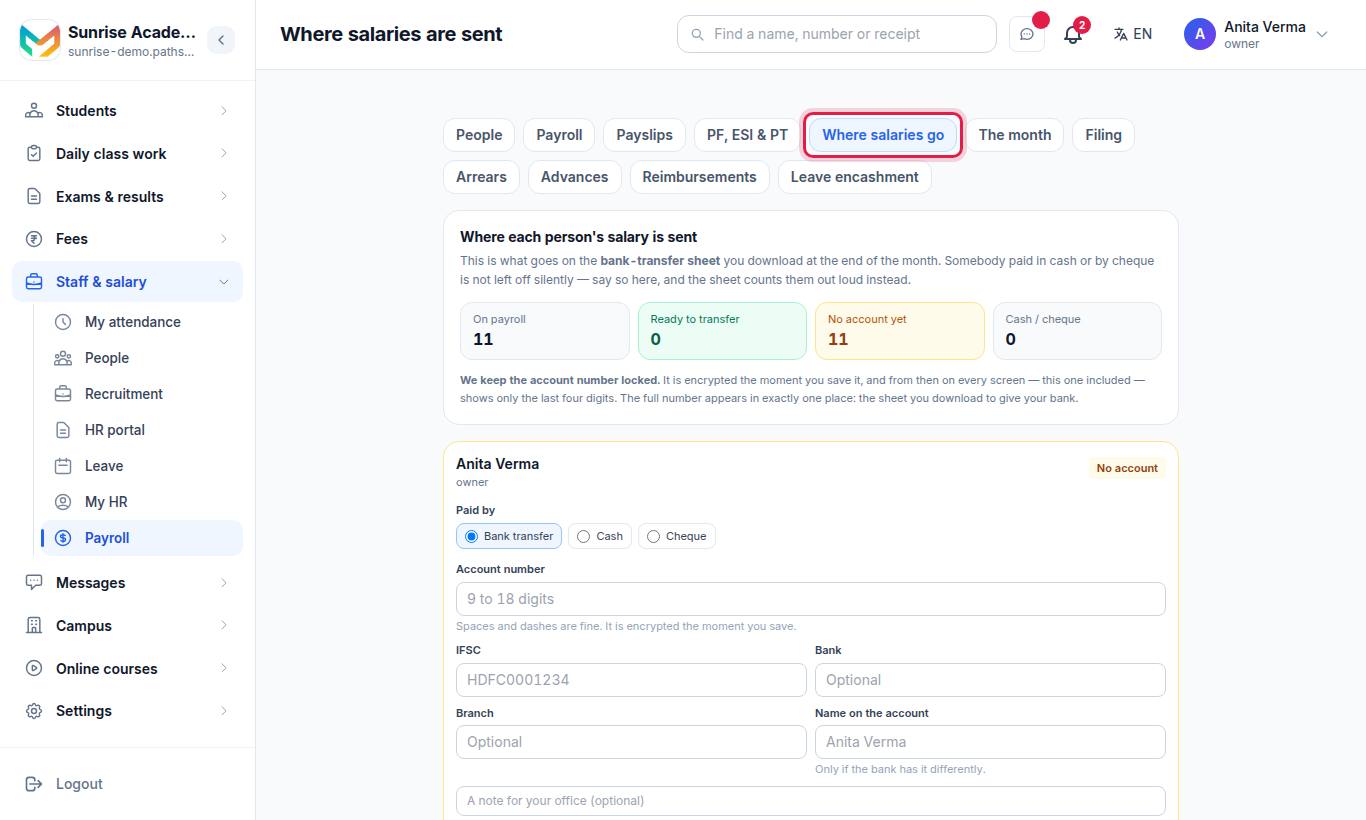
- Find the person in the list.
- Under Paid by, choose Bank transfer, Cash or Cheque.
- For a bank transfer, type the Account number (9 to 18 digits), the IFSC, and optionally Bank, Branch and Name on the account ("Only if the bank has it differently").
- Press Save. To clear the details, press Remove these details.
The screen shows counters: On payroll, Ready to transfer, No account yet and Cash / cheque.
Saving bank details needs MJX Payroll Basic or above (the same feature as the bank-transfer sheet). On Forever Free you can read the screen but nothing can be saved.
#Pay run settings
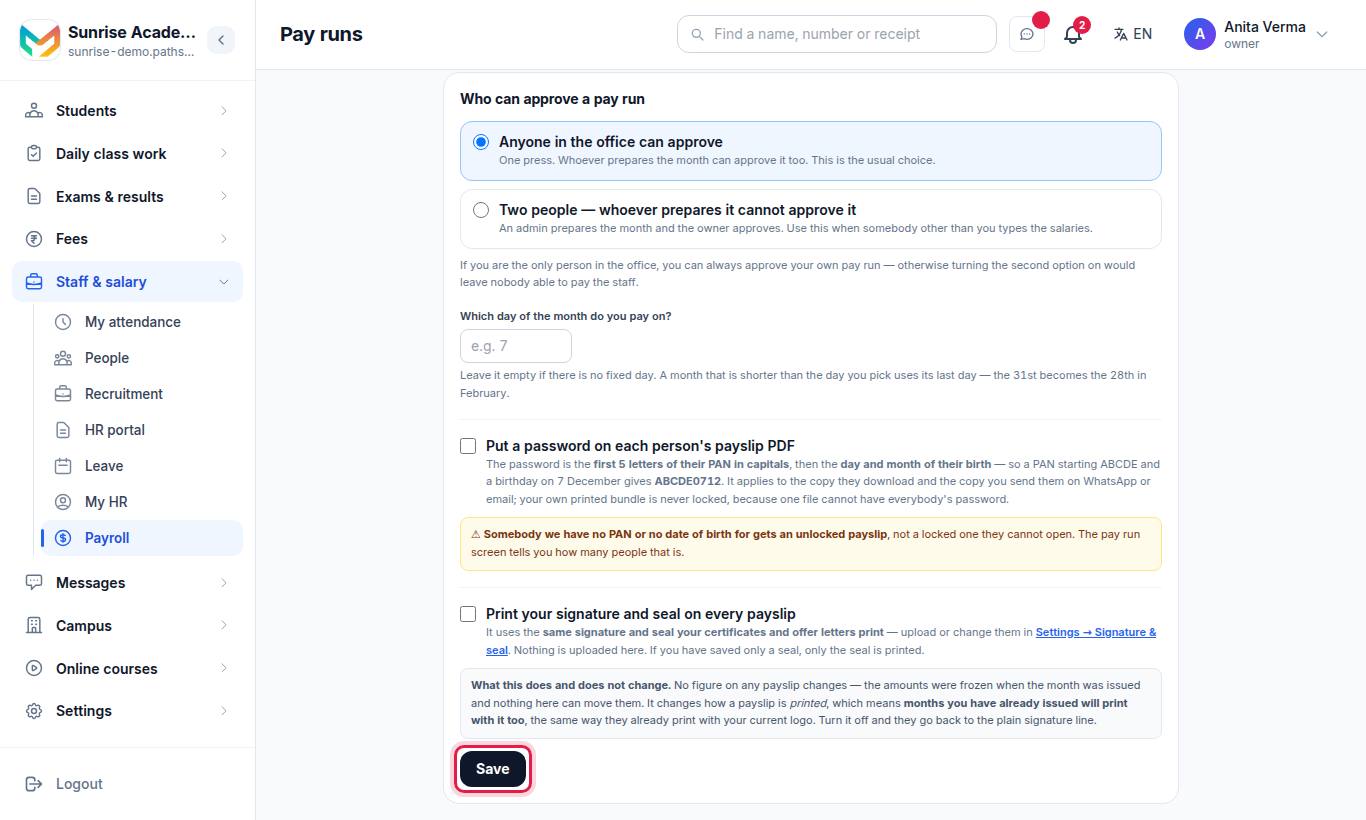
The bottom of the Pay runs screen holds the settings for every month:
| Setting | What it does |
|---|---|
| Who can approve a pay run | Anyone in the office can approve — one press; whoever prepares the month can approve it too (the usual choice). Two people — whoever prepares it cannot approve it — an admin prepares, the owner approves. If you are the only person in the office, you can always approve your own. |
| Which day of the month do you pay on? | 1 to 31. Leave it empty if there is no fixed day. A shorter month uses its last day — the 31st becomes the 28th in February. |
| Put a password on each person's payslip PDF | The password is the first 5 letters of their PAN in capitals, then the day and month of birth. A PAN starting ABCDE and a birthday on 7 December gives ABCDE0712. It applies to their download and to the copy sent on WhatsApp or email. Your own printed bundle is never locked. |
| Print your signature and seal on every payslip | Uses the same signature and seal your certificates and offer letters print. Upload them in Settings › Signature & seal. |
Press Save after changing any of them.
#Unpaid leave and loss of pay
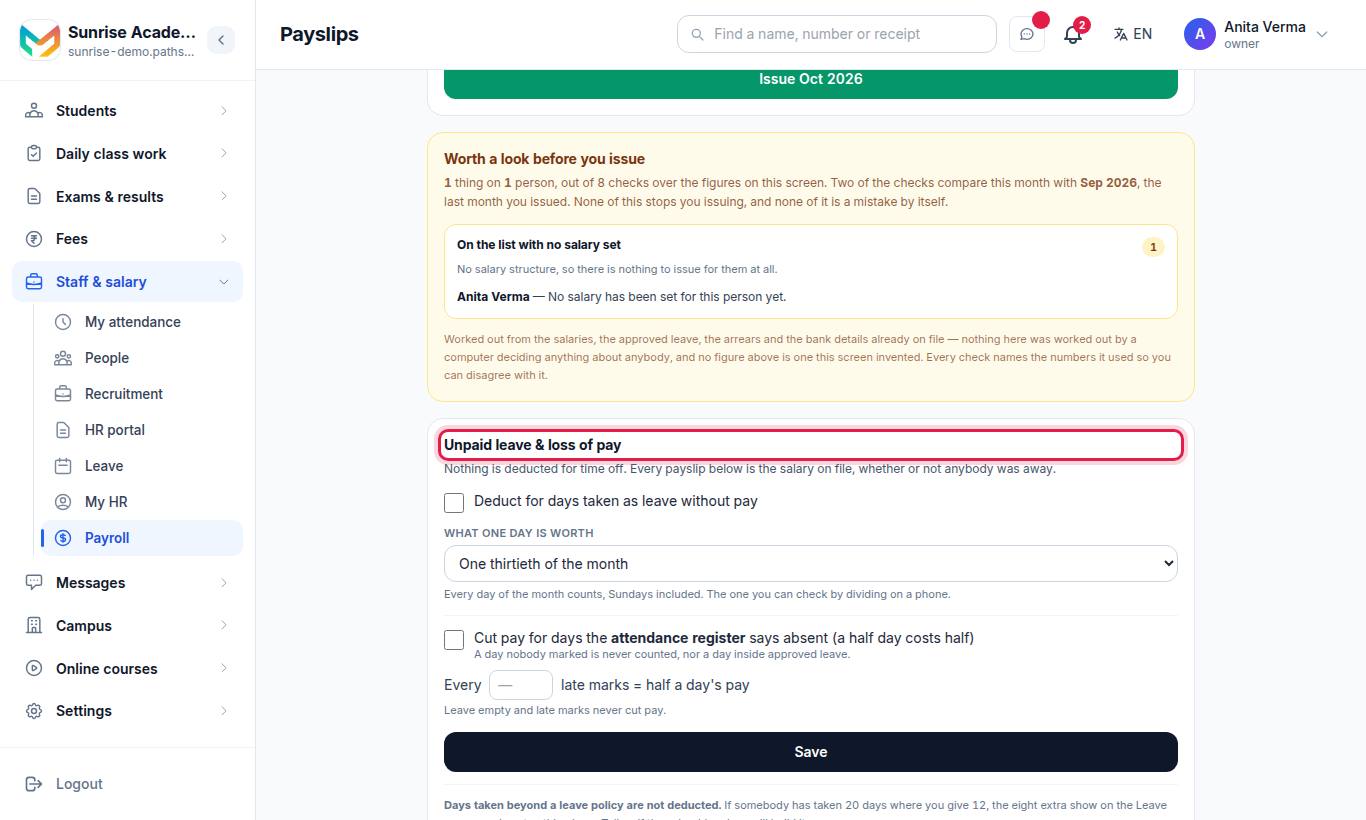
The Unpaid leave & loss of pay card on the Payslips screen sets how time off is costed:
- Tick Deduct for days taken as leave without pay.
- Choose What one day is worth:
- One thirtieth of the month — every day counts, Sundays included.
- One twenty-sixth of the month — the standard six-day working month.
- One day out of the days that month had — a day off in February costs a little more than one in March.
- With MJX Attendance Pro, you can also tick Cut pay for days the attendance register says absent (a half day costs half), and set "Every __ late marks = half a day's pay". A day nobody marked is never counted, nor a day inside approved leave.
- Press Save.
Days taken beyond a leave policy are not deducted. They show on the Leave screen. See leave.
#Who can set up payroll?
| Task | Who |
|---|---|
| Salaries | Owner and admin, or anyone given Set Salaries |
| Pay run settings, unpaid-leave policy | Owner and admin, or anyone given Manage Payroll |
| PF, ESI & PT, Filing numbers | Owner and admin, or anyone given Manage Filings |
| Where salaries go | Owner and admin, or anyone given Prepare a Pay Run |
Permissions are set in Sidebar › Roles & permissions. See roles and managers.
#Questions people ask
Do I have to finish every step before I can pay anybody?
No. The checklist only shows what is still missing. You can create and approve a pay run at any time, and the pay run lists any gaps under "Worth sorting out first".
We do not deduct PF, ESI or professional tax. What do I do with step 4?
Open PF, ESI & PT and save with nothing switched on. "None of them" is a valid answer and marks the step done.
Can I put a password on payslips?
Yes. On Pay runs, tick "Put a password on each person's payslip PDF". The password is the first 5 letters of their PAN in capitals plus their day and month of birth.
Where do I upload the signature printed on payslips?
In Settings › Signature & seal. Then tick "Print your signature and seal on every payslip" on the Pay runs screen.